What is that?
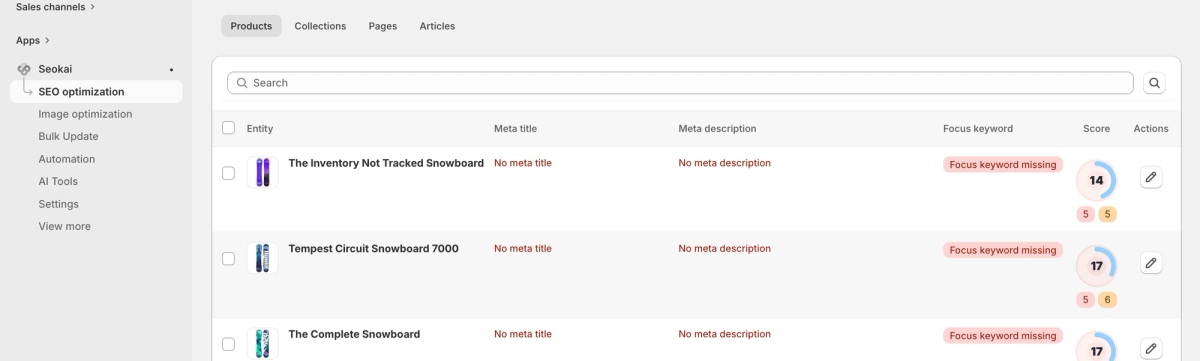
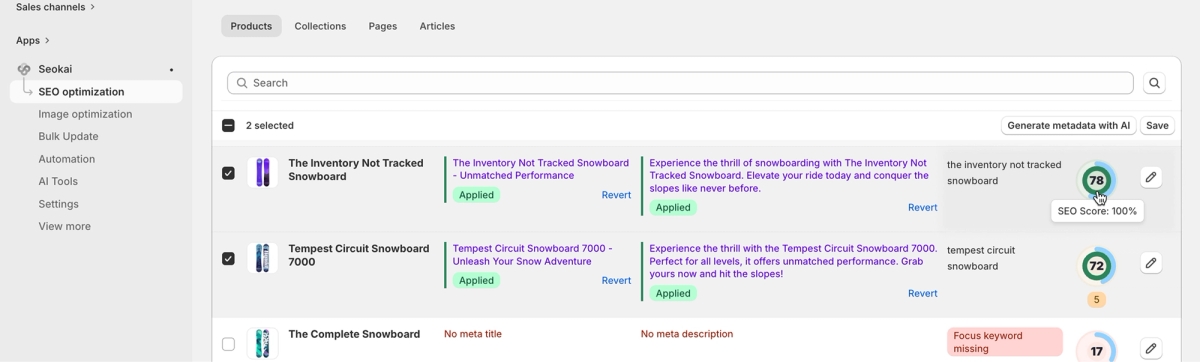
The Entity List is the main bulk SEO workspace inside the SEO optimisation area of the app. It shows your Products, Collections, Pages, or Articles in a searchable, paginated table. For each row you can:
- See the entity title, target keyword (or a warning if it’s missing), and (where relevant) extra context (e.g. product count for collections).
- Search the list, move between pages of results, and select multiple items for bulk actions.
- Use Generate with AI to create meta title, meta description, and meta keyword for everything you selected in one go.
- Edit AI output (or existing values) in the list, then Save to push approved metafields to Shopify.
- Open the full entity detail page from the row (edit icon or title link) when you need deeper editing.
The list also shows an SEO score panel per row and warns you if you try to leave while unsaved changes are still on screen.
How to Generate
Generate with AI runs a single bulk generation for all selected rows: for each selected entity the app sends a tailored prompt and receives meta keyword, meta title, and meta description together. After generation, those fields appear in an editable, generated state so you can review, tweak, apply, or revert before saving to Shopify. Requirements and limits (from the app):
- You must select at least one row.
- You can select up to 10 entities per generation (the app blocks more and shows a message).
- Generation needs enough credits and must respect your plan / product limits; otherwise the action is disabled or you’ll see an error-style toast.
- While generation or save is running, selection is temporarily disabled so the batch isn’t changed mid-flight.
Step 1: Open the right list and find your entities
Go to SEO optimisation and open the tab for the entity type you need (Products, Collections, Pages, or Articles).
Use the search box to narrow the list: type your term, press Enter or click the search control. Clearing search resets the filter (behaviour is tied to the URL query string so you can bookmark or refresh fairly predictably).
Use pagination (Next / Previous) when you have more items than fit on one page. The footer shows the current page (and total pages when the total count is known).
Step 2: Select entities for bulk work
Use the checkboxes to select the rows you want to include in Generate or Save.
Remember the 10-item cap for generation: if you need more, run generation in batches.
The app remembers your last non-empty selection in edge cases (e.g. when a “stay on page?” dialog appears) so bulk actions don’t disappear unexpectedly.
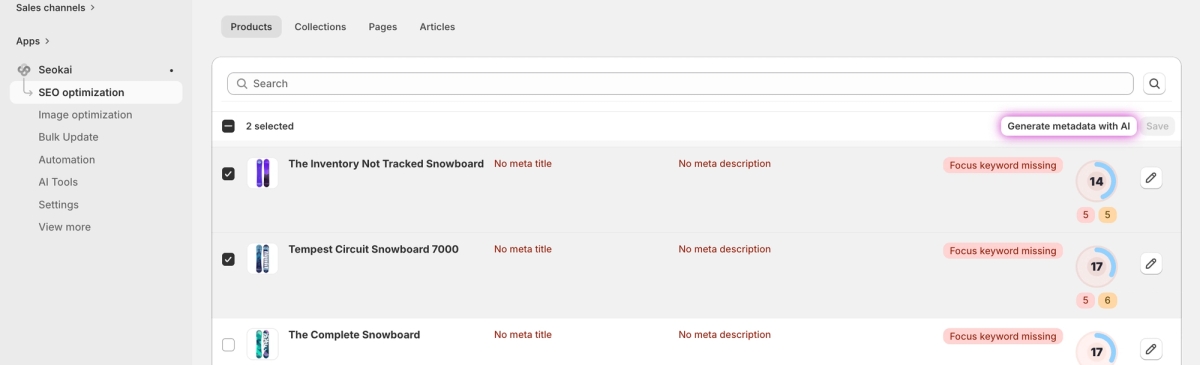
Step 3: Generate meta content with AI
With at least one row selected (and within limits), click Generate with AI in the bulk action bar.
Wait for processing: the list may show a loading state; don’t expect to change selection during this time.
When results return, each affected row should show generated meta fields where applicable. If generation fails globally (e.g. no usable results), you’ll get feedback via a toast.
Keyword missing is called out on rows that don’t have a keyword yet - fixing content strategy on those rows often improves AI output.
Step 4: Review and fine-tune in the list
For generated meta title and meta description, you can:
- Edit text in place (changes are debounced slightly so typing stays smooth).
- Use Apply / Revert style actions where shown, to align with “original vs generated” workflow.
The SEO score block on the row helps you see how strong the current meta looks before you commit.
For anything that needs more than list-level editing, use the title link or Edit control to open the entity detail page.
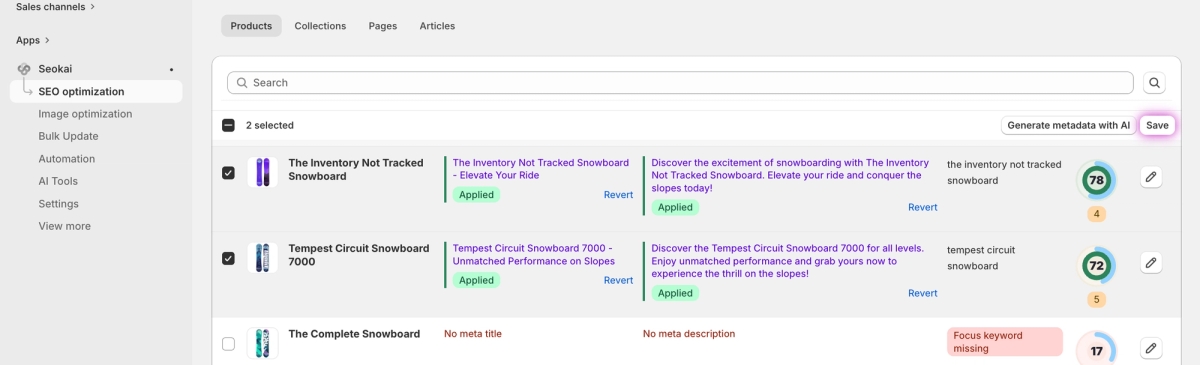
Step 5: Save to Shopify
Keep the rows selected that you want to push (save works on selected rows that actually have changes and at least one meta value).
Click Save in the bulk bar.
Save is only enabled when there is something worth saving (e.g. generated or edited meta); if nothing changed, you’ll be told there’s nothing to save.
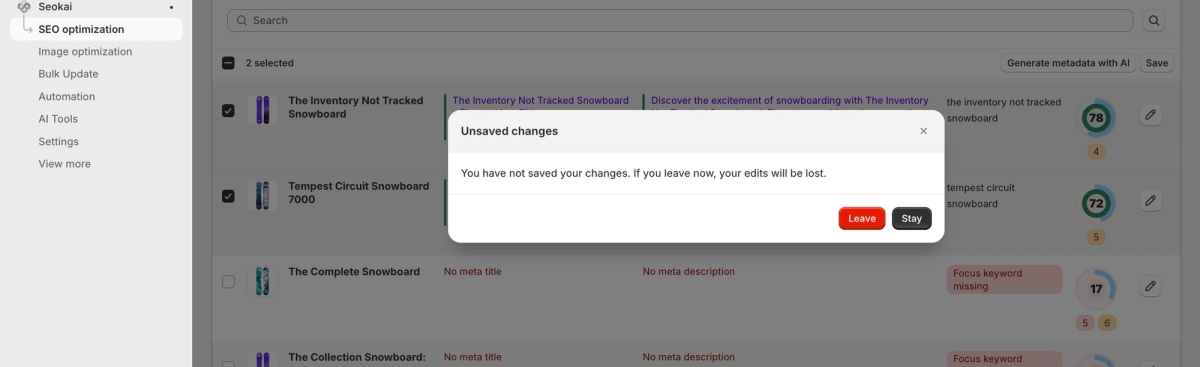
Step 6: Unsaved changes and leaving the screen
If you changed meta in the list but haven’t saved, the app treats that as unsaved work.
If you try to navigate away, you may see a confirmation dialog: you can stay and keep editing, or leave and discard the navigation - plan for this before starting large edits.