

Overview
The SEO editor is where you work on a single product, collection, page or blog post. AI can write or rewrite any field, and you decide what gets saved. Nothing changes on your store until you click Save.
Supported Content Types
Seokai works with four Shopify content types: Products, Collections, Pages and Blog posts. Each has its own tab on the SEO page.
How to Optimize an Item
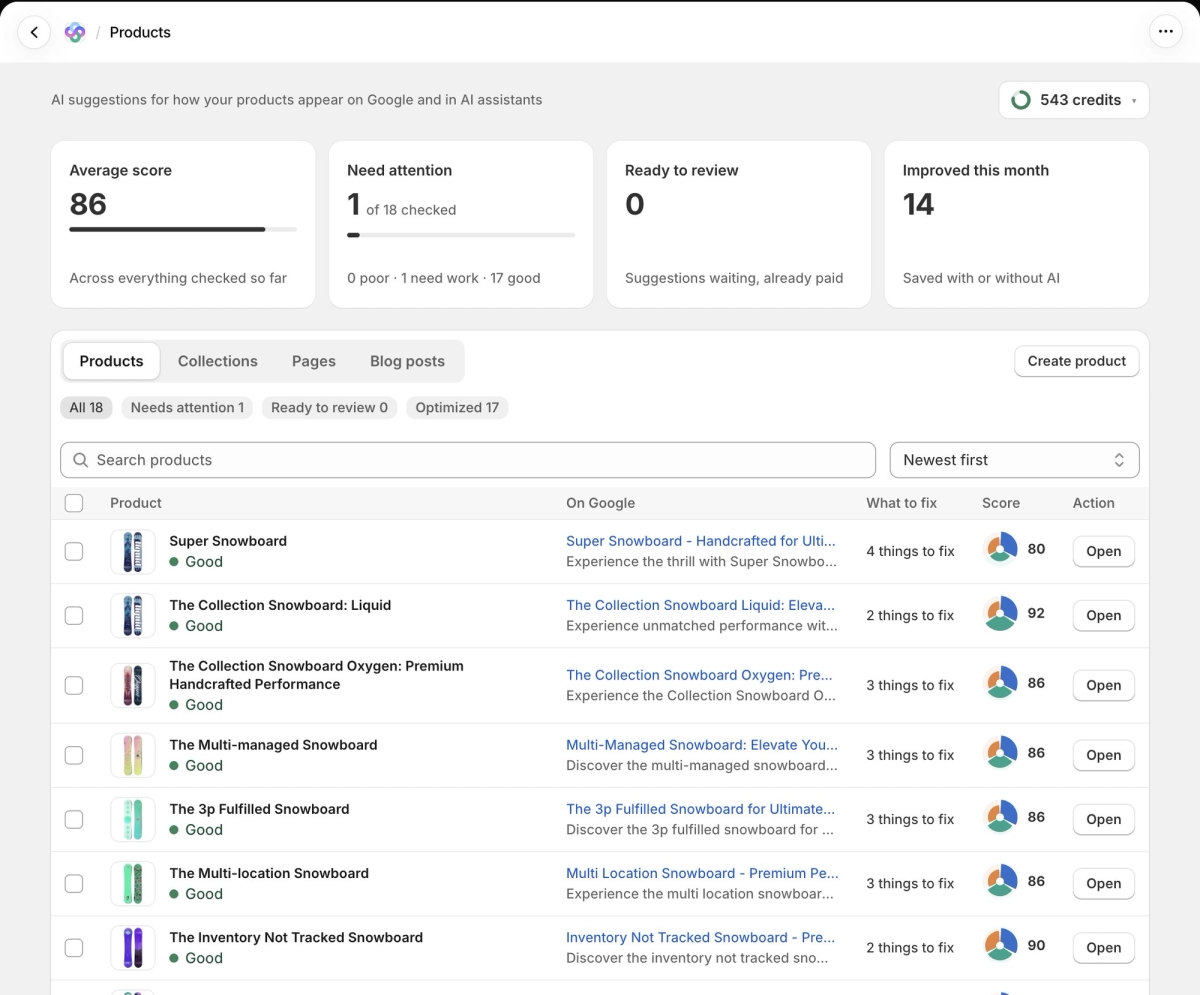
Step 1: Open the SEO list
Click SEO in the Seokai menu and pick a tab. Search or filter the list to find the item, then click Open on its row.
Step 2: Get to know the editor
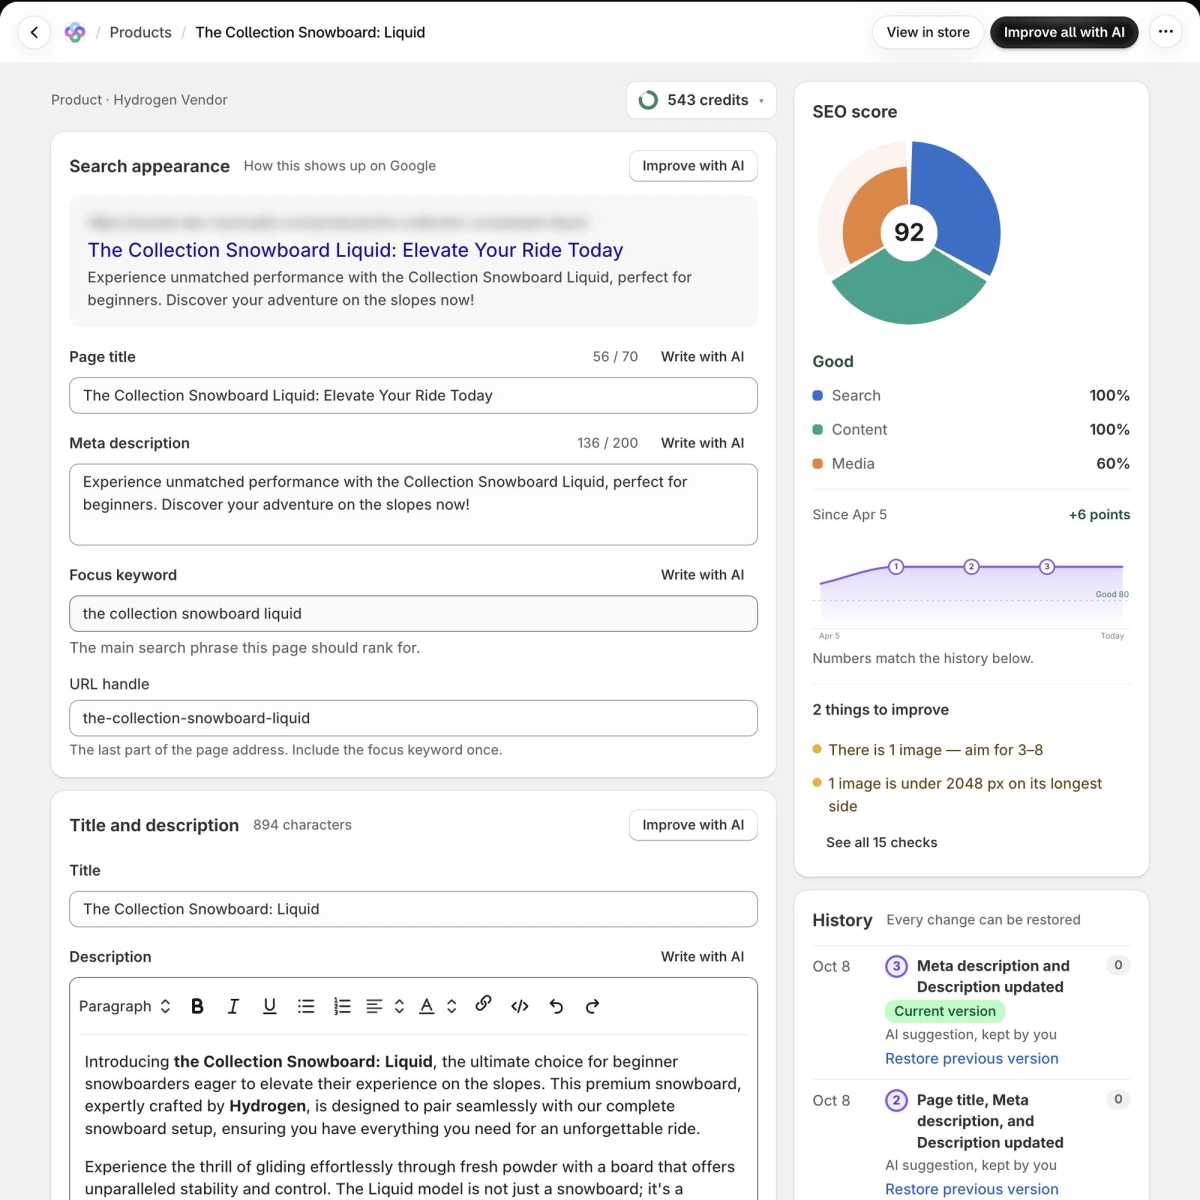
The editor has four sections:
- Search appearance: how the item shows up on Google. It has a search result preview, the Page title (aim for 50 to 70 characters), the Meta description (aim for 120 to 200), the Focus keyword (the main search phrase the page should rank for) and the URL handle.
- Title and description: the item's real title and description, which shoppers see in your store. For blog posts, the description is the article body.
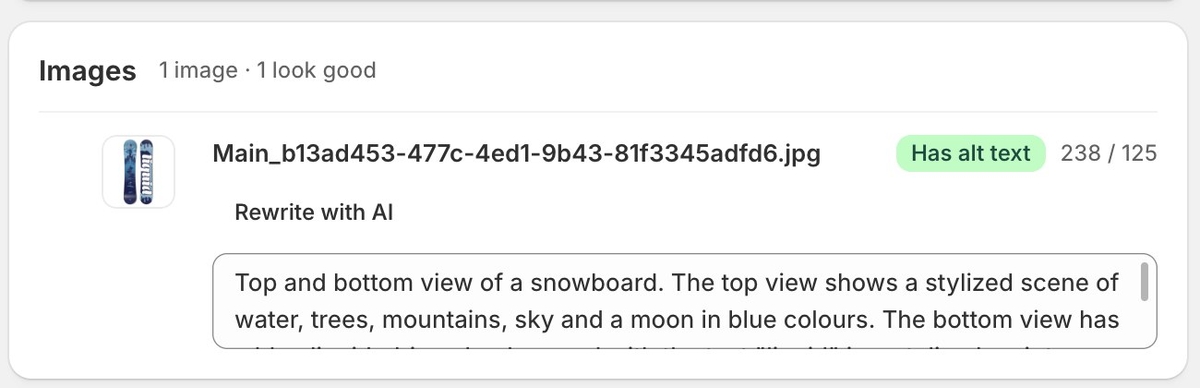
- Images: alt text for each image. Products, collections and blog posts have this section; pages don't.
- FAQ: 3 to 5 short questions and answers that Google and AI assistants use to answer shoppers.
The side column shows the SEO score, a chart of how it has changed, the checks the item still fails, and the item's History. The header has View in store and Improve all with AI.
Step 3: Let AI write
There are three ways to ask for AI help, from broad to narrow:
- Improve all with AI in the header works on every section. It runs in the background, and you can stop it.
- Improve with AI on a section works on that section only. On Search appearance it writes the page title, meta description and focus keyword together, for 1 credit on products and blog posts and 0.75 on collections and pages.
- Write with AI or Rewrite with AI next to a field works on that field only. For the page title, meta description or focus keyword this costs 0.25 credits each.
While AI is working, the button reads "Writing…". AI keeps your product and collection names and does not change URL handles.
Step 4: Review and save
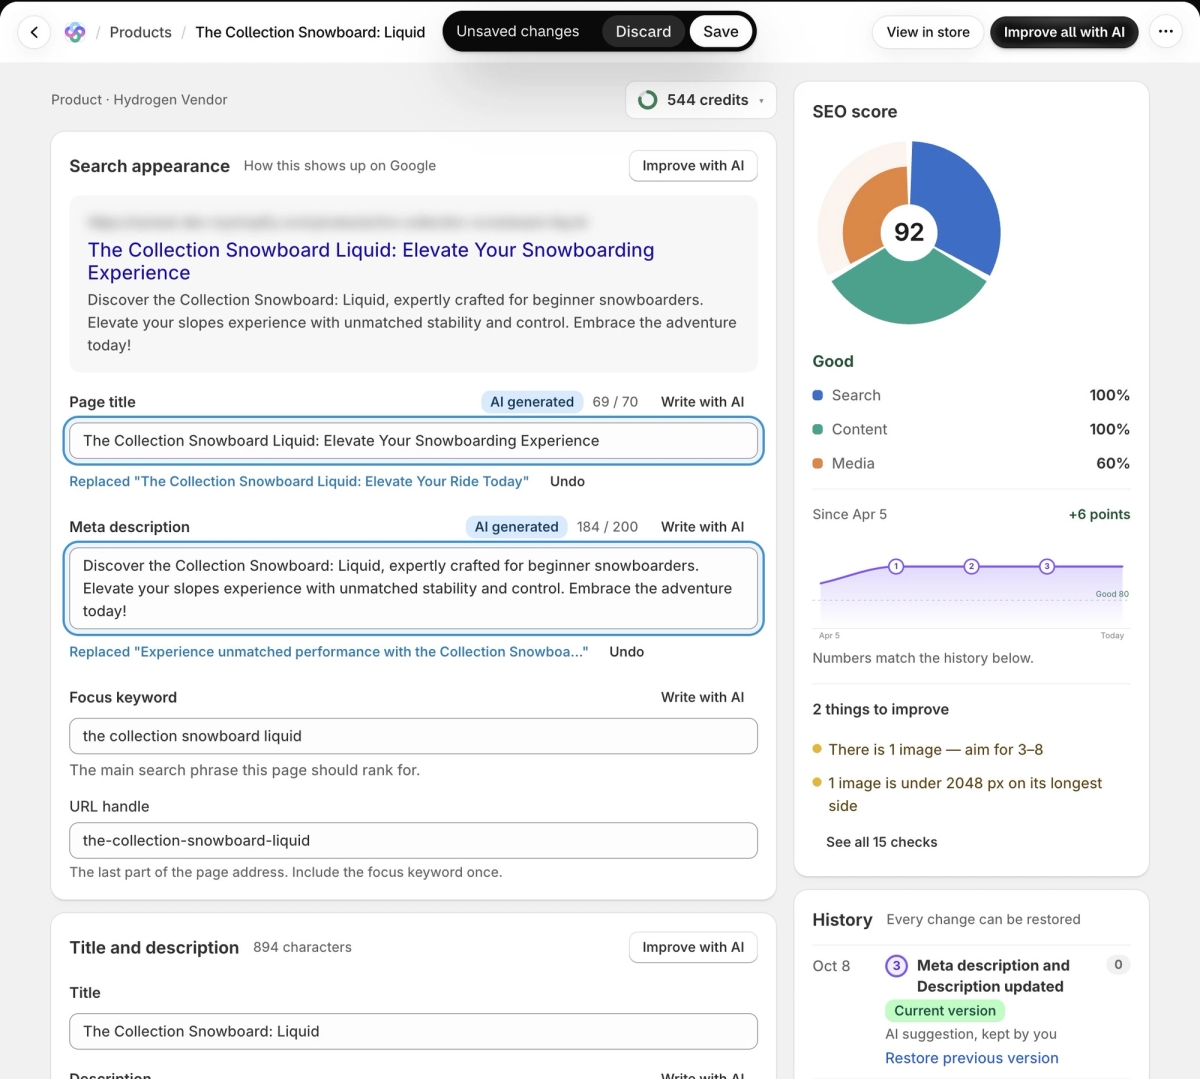
New AI text is outlined in blue and labelled AI generated. Under each changed field, a line shows the text it replaced, with Undo to bring it back. You can edit any field by hand.
As soon as anything changes, an Unsaved changes bar appears at the top of the page. Click Save to write the changes to Shopify, or Discard to drop them. The score card shows what your score will be before you save.
Every save is added to History. To undo a saved change, click Restore previous version on its entry and confirm.
Image Alt Text
The Images section lists each image with its file name, whether it has alt text, and a character count. Click Write with AI (or Rewrite with AI if the image already has alt text) and AI describes the photo itself. Alt text costs 0.25 credits per image. Check the suggestions, fix anything that's wrong, and untick any you don't want before you click Save.
To make image files smaller, use the Images page in the Seokai menu.
SEO Score
Each item gets a score from 0 to 100, made up of three areas: Search (50%), Content (30%) and Media (20%). A score of 80 or more counts as Good. The score card lists what to improve, and See all checks shows every check and whether the item passes it.
The chart under the score marks each saved change with a number that matches the entry in History, so you can see which change moved the score. For scores across your whole store, open the Statistics page.